
Resistance bands for beginners: start with your setup
Start with the band you own and a movement you can control. Identify the equipment, preview the exercise, and choose a manageable workout before adding more resistance.
By Band team
Published 3 min read
Updated
Practical guidance from the Band team.
1. Identify your band
A short closed loop, a long loop, and a tube with handles serve different setups. Match the shape and attachments shown in an exercise demonstration; a shared color or printed weight does not make two bands interchangeable.
Identify your band type2. Make room and check the equipment
Clear enough space to complete the movement without hitting furniture. Inspect the band and attachments before use, and follow the manufacturer’s instructions for anchoring, wear, and stretch limits. Do not improvise an anchor from furniture simply because it looks sturdy.
- Check the exercise for a mat, handles, or an anchor before starting.
- Choose resistance that lets you control both directions of the movement.
- Start with a comfortable range and pause if you need to reset.
3. Learn a movement before starting the timer
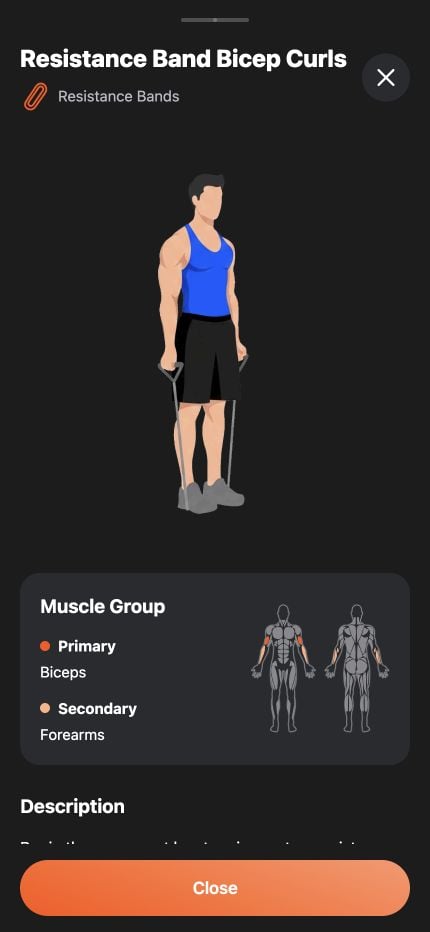
Open the exercise details to see the demonstration, instructions, and muscles involved. Try the setup without rushing. The website library includes real Band demonstrations so you can explore before downloading.
4. Preview your first workout
In Band, open Workouts and review a routine’s duration, difficulty, exercises, and rounds. A shorter session can make the first visit easier to plan. Check every exercise instead of assuming one band fits the entire routine.
Start when ready and use pause whenever you need more time. The timer and voice cues provide structure; they do not assess your technique.
See how to start a Band workoutYour first visit: preview, choose, then start
Before starting a session, open one exercise that matches your equipment. For a handled band, the curl page shows the band under the feet. For a short loop, the clamshell page shows placement around the thighs. These are equipment examples, not a two-exercise workout prescription.
Compare what you own with the demonstration. If the grip, placement, or range does not match, return to the equipment guide before proceeding. Once you have checked the movements in a routine, review its rounds and timing so the first timer cue is not a surprise.
5. Build a routine you can repeat
Keep the setup familiar while learning. When a routine becomes manageable, review one variable at a time, such as repetitions or resistance, while maintaining control. You do not need to change everything each session.
Use Builder when you want to choose the exercise order, rest, and rounds yourself.
Build your own routineBefore you train
Choose an amount of exercise that suits your current ability. Stop for pain, dizziness, or unusual breathlessness. If an injury or health condition affects exercise, seek advice from a qualified health professional.
Your next session starts here.
Take what you learn into BAND with guided workouts, interval timers, and voice cues.
Keep learning
Equipment3 min read
Loop vs. tube resistance bands: which setup fits you?
Compare long loops, mini loops, and tube bands with handles, then find real Band exercise demonstrations for your setup.
Getting started1 min read
Find your first Band workout
Preview a guided workout, check the exercises, and make space for a session that fits your day.
Equipment3 min read
Build a home gym with resistance bands
Plan a compact resistance band workout space, check equipment requirements, and choose exercises for the setup you actually own.
Workout builder1 min read
Build a workout that fits your day
Start with a template or choose your own exercises, then adjust the order, timing, rest, and rounds.