
Build a home gym with resistance bands
Start with a clear training space and equipment suited to a few movements. Add accessories only when an exercise you want to perform needs them.
By Band team
Published 3 min read
Updated
Practical guidance from the Band team.
Start with space, not a shopping list
Allow room for your full reach and the band’s movement path. Choose stable footing and keep pets, children, and obstacles out of the exercise area. Store bands away from conditions that damage the material, following their care instructions.
A simple setup without an external anchor
Some exercises use a band under your feet or a mini loop around the legs. This can reduce the equipment needed, but the exact grip and placement still matter. Preview the individual exercise before deciding that it fits your space.
- A suitable band for the movements you choose.
- Clear floor space and a mat if a movement calls for one.
- Your phone positioned where the demonstration and controls are easy to see.
Add an anchor only when needed
An anchor expands the directions you can pull from. It also adds installation and compatibility requirements. Use the anchor manufacturer’s instructions and rated equipment; inspect attachments before training. A wall, door, or post is not automatically a safe mounting point.
Check whether your chosen routine includes anchored exercises before you start. If your setup cannot support one, choose another suitable routine rather than improvising.
Make your equipment list a workout
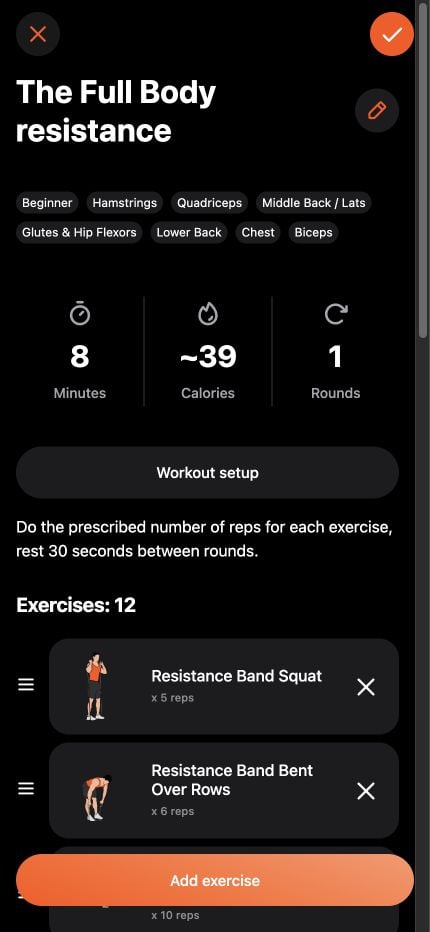
Open the Band workout preview and review each exercise. If you prefer selecting every movement, Builder lets you create and save your own routine. Review repetitions or time, rest, and rounds before the session.
Check three movements before buying accessories
Suppose you already own a handled band and want to explore standing curls, bent-over rows, and squats. The Band demonstrations linked here use under-foot setups rather than a door anchor. Reviewing those pages first may show that an anchor is not needed for those particular movements.
This is an equipment-planning example, not a complete or personalized program. If the routine you choose includes other movements, inspect those too. Buy an accessory to meet a verified exercise requirement, rather than assuming every band workout needs the same kit.
Expand when there is a reason
A second resistance level or different band shape may be more useful than a large accessory bundle. Decide what movement or adjustment you need first. Compare compatibility and care requirements as well as price.
Band is a training app, not an equipment seller. The demonstrations show specific setups; matching them is more useful than buying a product simply because it is labeled a resistance band.
Before you train
Choose an amount of exercise that suits your current ability. Stop for pain, dizziness, or unusual breathlessness. If an injury or health condition affects exercise, seek advice from a qualified health professional.
Your next session starts here.
Take what you learn into BAND with guided workouts, interval timers, and voice cues.
Keep learning
Equipment comparisons3 min read
Resistance bands vs. the gym: where will you train?
Compare home resistance band training with a gym membership for equipment, time, cost, coaching, and consistency.
Equipment3 min read
Loop vs. tube resistance bands: which setup fits you?
Compare long loops, mini loops, and tube bands with handles, then find real Band exercise demonstrations for your setup.
Training guides3 min read
Resistance bands for beginners: start with your setup
Learn how to identify your resistance band, preview exercises, and choose your first guided workout in Band.
Workout builder1 min read
Build a workout that fits your day
Start with a template or choose your own exercises, then adjust the order, timing, rest, and rounds.